Physical Model to AI Render: Step-by-Step Guide (2026)
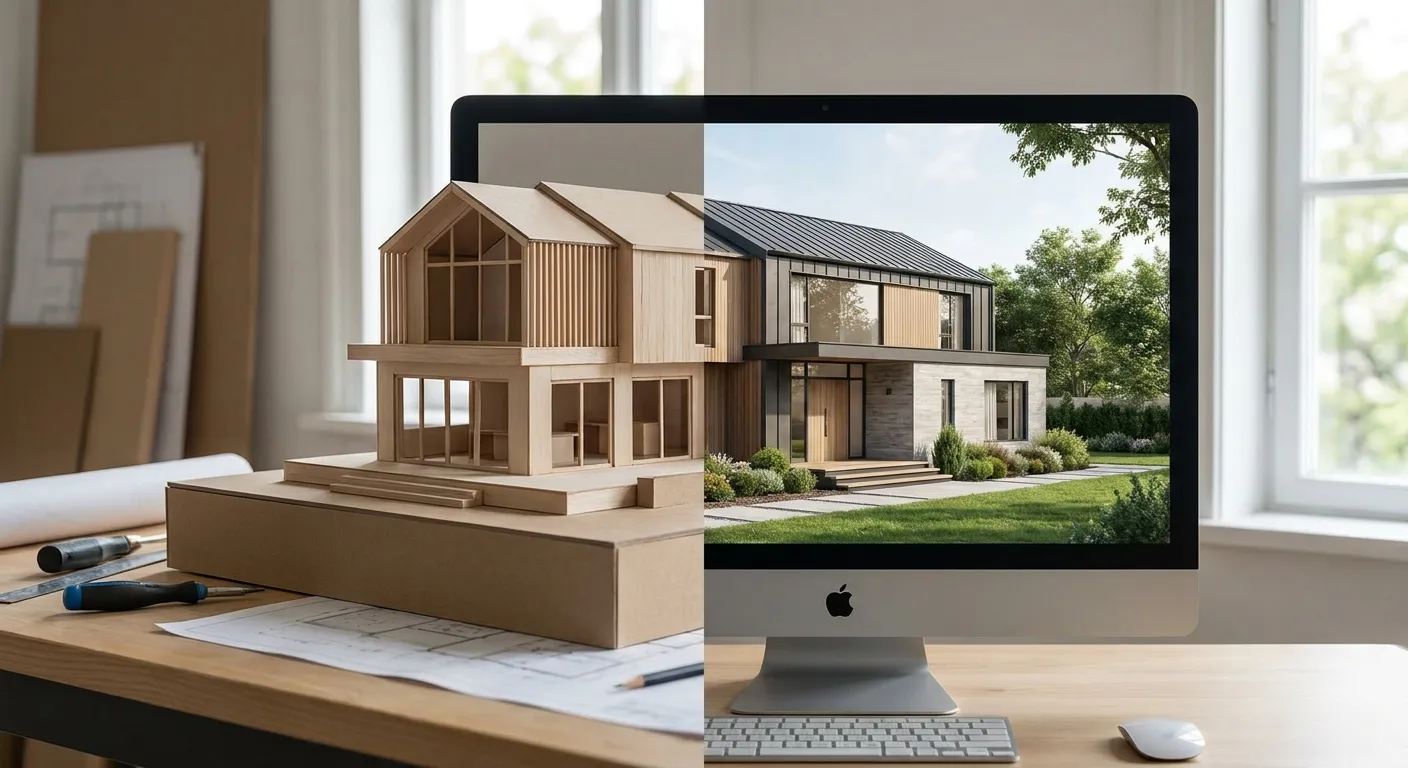
A physical model photo — foam board, chipboard, 3D print, laser-cut — turns into a photorealistic architectural render without touching V-Ray, Lumion, or a camera rig. Photograph the model correctly, upload it to an AI rendering tool, describe the materials and light, and you get a client-ready image in under ten minutes.
- A physical model photo converts to a photorealistic AI render in under 10 minutes with the right prompt.
- Shoot in flat, even light at eye level — harsh shadows confuse the AI more than a soft-focus photo does.
- A one-sentence material and lighting prompt matters more than photo resolution — name the glass, wood, and time of day.
- Warped stairs or melted mullions fix with a second prompt pass, not a full re-shoot.
- Export at 300 DPI for presentation boards — the default web-resolution download looks soft when printed.
Why this matters
Physical models are still the default for design juries, client pitches, and early-stage concept reviews in 2026, even as most firms render everything digitally once the model exists in Revit or SketchUp. The problem: a physical model doesn't come with a 3D file attached. If you only have the foam-board version, or the model was built by hand and never modeled digitally, the usual rendering pipeline is dead on arrival.
AI rendering tools solve this differently. Instead of requiring a 3D file, PromptRender works from a single photo — the model becomes the reference image, and the AI fills in materials, lighting, and atmosphere around the geometry you already built. That means a $40 foam model photographed on a phone can produce a render that looks like it came out of a $200/hour visualization studio, without the studio.
What you'll need
- A physical model — foam board, chipboard, museum board, 3D-printed, or laser-cut all work
- A phone or camera and one flat, even light source (window daylight or two desk lamps at matching angles)
- A plain, uncluttered background — poster board, foam core, or a blank wall
- An AI rendering account with at least one render credit available
- 10 to 15 minutes — most of that is writing the prompt, not waiting on a render queue
The steps
1. Photograph the model at eye level, not from above
Shoot from the angle a person would actually see the building, roughly waist to chest height for an exterior, not a bird's-eye view down onto the roof. This accomplishes one thing: it gives the AI a camera perspective it can extend into a believable render instead of a diagram-style top-down shot. Get within 2 to 3 feet of the model and fill most of the frame with it. Expected outcome: a photo where the building reads as a building, not a tabletop object. Common mistake: photographing from directly above because it's easier — this produces a render that looks like a satellite image, not architecture.
2. Crop and clean the shot before you upload
Crop out hands, rulers, coffee cups, and the edge of the desk. Why it matters: stray objects in frame get interpreted as part of the scene, and you'll end up rendering someone's phone charger as a chrome sculpture. Use your phone's native crop tool — no editing software required. Aim for the model filling 70-80% of the frame with a clean margin around it. Expected outcome: a photo where the only real-world object visible is the model itself.
3. Choose the closest camera angle preset
Most AI rendering tools, including PromptRender, offer angle presets — eye-level exterior, three-quarter aerial, interior walkthrough. Pick the one that matches your photo's actual perspective rather than the one you wish you'd shot. This matters because a mismatch between the preset and the real photo angle is the single biggest cause of warped geometry in the output. Expected outcome: a generation that keeps your model's proportions instead of stretching the facade.
4. Write a one-sentence material and lighting prompt
Name the materials explicitly: "board-formed concrete, black steel window frames, oak decking, late-afternoon light with long shadows." Vague prompts like "make it look nice" produce generic results because the AI has nothing specific to render. This is the step that separates a flat, cardboard-looking output from a convincing one — see how PromptRender's guide to creating a photorealistic rendering from a 3D model breaks down prompt structure in more detail. Expected outcome: a render where the facade materials look distinct from each other instead of one uniform gray.
5. Generate the first pass and check the geometry
Run the generation and look at the structural lines before you look at anything else — roofline, window grid, column spacing. This step accomplishes quality control before you invest time in refining materials that sit on broken geometry. If a stair rail bends or a window disappears, don't discard the render — that gets fixed in the next step. Expected outcome: a first-pass image where the building's shape and proportions match the physical model, even if the finish looks rough.
6. Run a second prompt pass to fix specific details
If the first pass nailed the shape but the materials look off, run a second generation targeting only what's wrong — "keep the same building, change the roof material to standing-seam metal." This matters because iterating on one detail is faster and cheaper than starting over. Expected outcome: a refined render that keeps the good parts of pass one and corrects the weak parts. Common mistake: rewriting the entire prompt from scratch when only one element needed fixing, which resets progress on everything else.
7. Export at print resolution for the board or deck
Before exporting, check the resolution setting — most tools default to a web-optimized size that looks soft once it's blown up on a 24x36 presentation board. Set the export to at least 300 DPI at your final print dimensions. Expected outcome: a render that holds up in a printed board review in 2026, not just on a laptop screen during a Zoom call.
Turn your model photo into a render
Upload a physical model photo and generate a photorealistic render in minutes.
Troubleshooting
Windows read as black holes. The AI didn't recognize glass because the prompt didn't mention it. Add "clear glazing, visible interior warmth" to the prompt and regenerate that pass alone.
Stair railings or mullions warp or melt. This is a common failure point in thin, repetitive geometry photographed at an angle. Run a targeted correction pass — PromptRender's guide to fixing distorted details in AI-generated renders walks through the exact prompt phrasing that resolves this without a full re-render.
The render still looks like foam board. The AI picked up your model's actual surface texture instead of overriding it. Add an explicit material override in the prompt — "replace matte white surface with painted stucco" — rather than assuming the AI will infer the intended finish.
Shadows fall the wrong direction or look flat. Specify a time of day and sun direction in the prompt — "morning light from the east" reads very differently than "golden hour, low sun." Vague lighting language produces flat, midday-everywhere results.
The building looks like a dollhouse, not a building. Scale cues are missing. Mention human figures, cars, or furniture explicitly in the prompt so the AI anchors the render to real-world proportions instead of guessing.
Tools and resources
- A physical model, photographed in flat daylight or matched studio lighting
- An AI rendering account with render credits available
- A tripod or phone stand for consistent framing across multiple angles
- A plain background — foam core or a blank wall works better than a cluttered desk
What to do next
Once the render passes review, the next bottleneck is usually output quality for print — most default exports look sharp on screen and soft on paper. Before sending anything to a printer or client deck, confirm the file meets presentation resolution standards rather than assuming the default export is print-ready.
FAQ
Can you really convert a physical model photo into an AI render?
Yes — a single clear photo of a physical model is enough input for an AI rendering tool to generate a photorealistic version, no 3D file required. Lighting and framing quality in the original photo directly affect the render's accuracy.
What's the best lighting for photographing a model before rendering it?
Flat, even light from a window or two matched desk lamps works best — harsh directional shadows confuse the AI's read on the model's actual geometry. Avoid mixed light sources like a lamp plus a window, which creates conflicting shadow directions.
Why does my AI render look distorted or warped?
Distortion usually comes from a camera angle preset that doesn't match the photo's real perspective, or thin repetitive elements like railings that the AI misreads. A targeted second prompt pass fixes most of these without a full re-render.
How long does it take to render a physical model photo with AI?
A full pass from photo upload to a refined, print-ready render takes about 10 minutes in 2026, including one correction pass. The prompt-writing step takes longer than the actual generation.
Do I need a 3D model file to use AI rendering software?
No — AI rendering tools built for photo input, including PromptRender, work directly from a photograph of a physical model or a screenshot from software like SketchUp or Revit. A 3D file is not required for this workflow.
What resolution should I export an AI render at for print?
Export at a minimum of 300 DPI at your final print dimensions for presentation boards or bound decks. The default web-resolution export looks soft once printed at 24x36 inches or larger.
Is AI rendering better than hiring a visualization studio for a model photo?
For early concept and pitch-stage renders, AI rendering from a model photo delivers a usable image in minutes instead of days, at a fraction of a studio's per-image cost in 2026. For final marketing renders needing pixel-level art direction, a studio still has an edge.
One last thing
The single biggest quality lever isn't the camera or the model's craftsmanship — it's the material sentence in the prompt. A blurry phone photo with a specific, well-written prompt consistently outperforms a crisp DSLR shot with a vague one, because the AI is filling in materials and light from language, not just pixels.