How to Turn a Sketch Into a Render (2026 Guide)
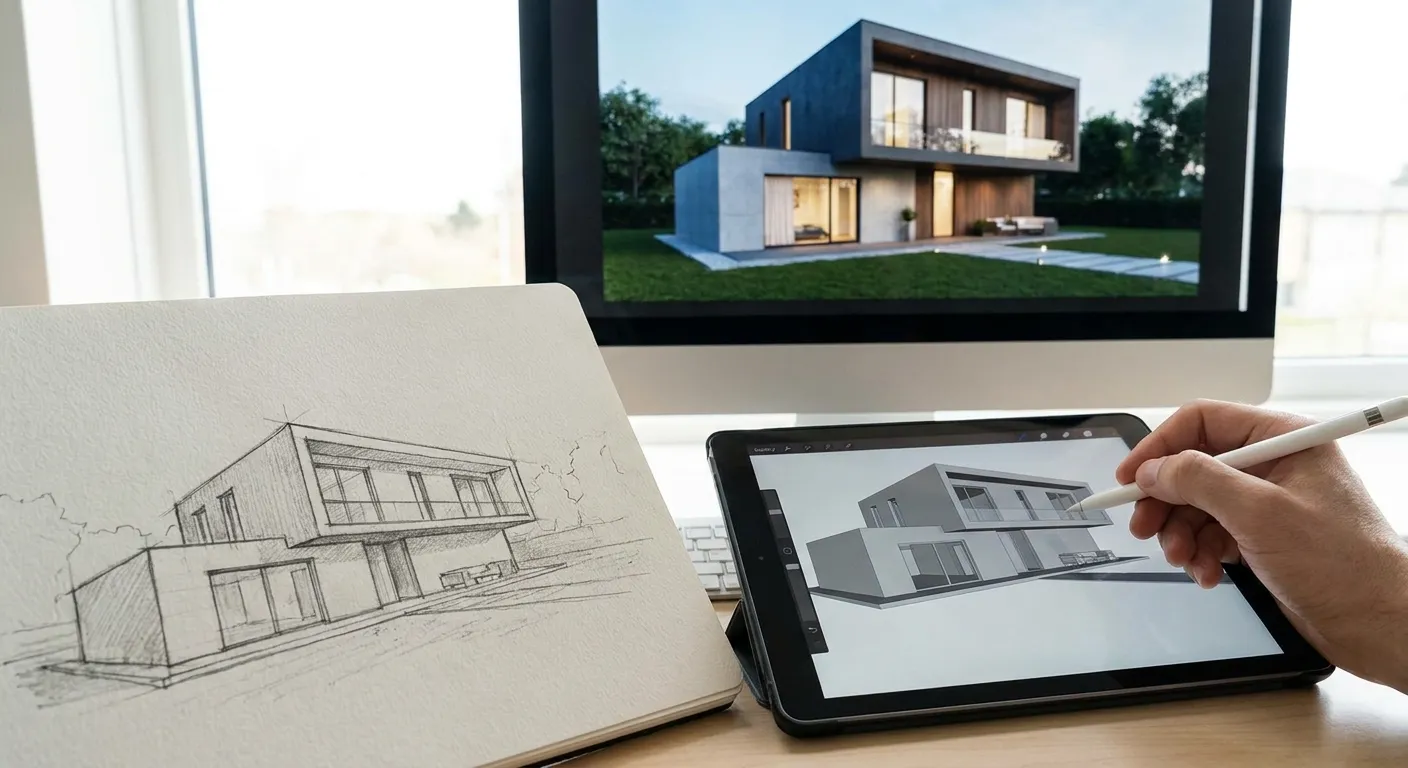
A hand sketch is not a 3D model, so most AI rendering tools choke on it — but with the right prep and prompt, you can turn a napkin drawing or a marker perspective into a photorealistic render in under five minutes.
- PromptRender turns a photographed or scanned hand sketch into a photorealistic render in minutes — clean line work, high contrast, and a detailed prompt matter more than drawing skill.
- Flat, top-down lighting and a phone scan app beat a raw photo for sketch quality in 2026.
- Vague prompts produce generic output — describe materials, camera angle, and lighting the way you'd brief a 3D artist.
- If the sketch has heavy shading or perspective distortion, trace it digitally first — Skip feeding shaky freehand lines straight into any AI render tool.
Why this matters
Architects and interior designers still sketch first. Concept sketches happen faster than modeling, and clients respond to a hand-drawn perspective before they respond to a wireframe.
The problem in 2026: sketch-to-render AI models are trained mostly on clean line art and 3D geometry, not on messy graphite with erased lines and coffee stains. Feed a rough sketch straight into a generic AI image tool and you get a random image that vaguely resembles architecture — not a render you can send to a client.
The fix is workflow, not talent. Prep the sketch correctly, write a prompt like a render brief instead of a caption, and the output holds up as a presentation-ready visual.
What you'll need
- A hand sketch — pencil, marker, or pen on paper, ideally with clear outlines rather than heavy cross-hatching
- A phone with a scanning app (Notes, Adobe Scan, or similar) or a flat-bed scanner
- A photo editor or the crop/contrast tool built into your scanning app
- An AI rendering tool that accepts image uploads with text prompts — PromptRender works directly from an uploaded image and a written description
- 5-10 minutes per sketch, plus render credits or generation time depending on the tool
The steps
1. Redraw or clean the sketch before you scan it
AI models read edges, not intent. If your original sketch has overlapping guideline strokes, erased sections, or shading that obscures the outline, the model will misread walls, windows, and rooflines.
Trace over the final lines with a darker pen or marker so the structure reads as one continuous shape. Skip this step and the render will hallucinate extra doors or merge two windows into one — a common mistake with first-pass sketch renders.
Expected outcome: a sketch where every wall, opening, and roofline is a single unbroken line, legible from three feet away.
2. Scan flat, under even light
A phone photo taken at an angle introduces perspective distortion the AI will bake into the render. Use a scanning app that auto-corrects perspective, and shoot under flat, diffuse light — a window with indirect daylight beats a desk lamp, which throws shadows across the paper that the model can mistake for shading intent.
Export at the highest resolution the app offers. Low-resolution scans lose fine line detail, and the render inherits that blur as a soft, undefined structure.
Common mistake: scanning under a ceiling light that casts a hot spot in the center of the page — the AI reads that bright patch as a light source in the scene and skews the render's lighting.
3. Crop tight and boost contrast
Crop out margins, notes, and stray marks so only the drawing remains in frame. Then push contrast up — black lines on white ground, no gray gradient — using your editor's auto-contrast or a manual levels adjustment.
This single step does more for output quality than any prompt tweak. A high-contrast line drawing tells the AI exactly where geometry starts and stops; a washed-out scan leaves it guessing.
4. Upload and describe the scene like a render brief
Open PromptRender, upload the cleaned sketch, and write a prompt the way you'd brief a 3D artist — not a caption. Name the building type, the primary material (board-formed concrete, cedar siding, glass curtain wall), the time of day, and the camera angle you drew from (eye-level exterior, three-quarter aerial, interior looking toward the window wall).
Vague prompts like "modern house, nice lighting" return generic stock-render results. Specific prompts — "single-story residence, white stucco and dark aluminum window frames, late afternoon sun from the left, eye-level street view" — return a render that matches the sketch's actual proportions and intent.
Why it matters: the AI uses your sketch for geometry and your text for everything the sketch can't show — material, light, atmosphere. Skip the detail and it fills the gap with defaults.
5. Generate, then compare against the sketch's proportions
Run the generation and check the result against your original drawing before moving on. Confirm window count, roof pitch, and door placement match what you drew — AI models occasionally add or drop an opening, especially on sketches with ambiguous perspective.
If proportions are off, regenerate rather than accepting a close-enough result. Most tools including PromptRender let you regenerate on the same upload without burning a full new credit cycle in some plans — check your plan's render credit terms on the pricing page before assuming.
6. Refine with a follow-up prompt instead of starting over
Once the base render is close, use a second, narrower prompt to fix one thing at a time: "add warm interior lighting visible through the windows" or "change roof material to standing-seam metal." One change per pass keeps the AI from re-rolling the whole composition and losing the parts that already worked.
This is the difference between a render that took two attempts and one that took eight — iterate narrow, not broad.
7. Export at full resolution for client delivery
Download the final render at the highest resolution the tool offers before dropping it into a deck or PDF. A render that looks sharp on screen at 50% zoom can look soft printed at full page size if you exported the compressed preview instead of the full file.
Troubleshooting
- The render ignores your sketch's perspective entirely. The scan likely has visible skew — redo step 2 with the auto-straighten feature in your scanning app rather than a freehand phone photo.
- Windows or doors appear in the wrong place. Heavy shading near openings confused the edge detection — go back to step 1 and outline openings with a bold, single line.
- The output looks photorealistic but generic, not like your design. Your prompt was too short. Add material names, a specific light direction, and the exact camera angle from the sketch.
- Interior renders come out with distorted proportions. Hand-drawn interior perspectives with converging lines are the hardest input type — trace the sketch digitally over a rough one-point perspective grid before uploading.
- The render looks flat with no shadow depth. Specify time of day and sun direction explicitly in the prompt; "nice lighting" gives the model nothing to work with.
- Colors don't match what you intended. Name exact material and color in the prompt — "warm oak flooring," not "wood floor" — since the model defaults to the most common material association otherwise.
Turn your next sketch into a render
Upload a hand sketch or 3D screenshot and get a photorealistic render in minutes.
Tools and resources
- PromptRender — uploads a sketch or 3D screenshot with a text prompt and returns a photorealistic render
- A scanning app with auto-perspective correction (built into most phone Notes apps as of 2026)
- Best AI tools for turning sketches into renders if you want to compare sketch-to-render options before committing to one workflow
- How to create a photorealistic rendering from a 3D model once your project moves past sketch stage into a modeled file
What to do next
Once a project moves from hand sketch to a working 3D model in SketchUp, Revit, or Rhino, the workflow changes — you're rendering screenshots, not scanned drawings. Read how to create a photorealistic exterior render with AI for the next stage of the same project, and check best AI visualization tools for freelance 3D artists if you're evaluating tools beyond a single render.
FAQ
How do I turn a sketch into a render for free?
Most AI rendering tools including PromptRender offer a limited number of free or trial render credits in 2026, enough to test the sketch-to-render workflow before paying. Check the current credit terms on the pricing page since allowances change.
What's the best AI tool to turn a sketch into a render?
PromptRender handles sketch-to-render conversion directly from an uploaded image plus a text prompt, without requiring a 3D model file first. It works well for architects and designers who sketch before modeling.
Do I need a 3D model to get a photorealistic render?
No — a clean, high-contrast hand sketch is enough input for AI rendering tools in 2026, though a 3D model screenshot generally produces more geometrically accurate results than a freehand drawing.
Why does my sketch-to-render output look generic?
A vague text prompt is almost always the cause. Name the exact material, light direction, and camera angle instead of general terms like "modern" or "nice lighting" to get a render that matches your design intent.
How long does it take to render a hand sketch with AI?
Generation itself takes one to three minutes with most tools in 2026. The prep work — cleaning the sketch, scanning flat, boosting contrast — takes another five to ten minutes and matters more for output quality than the generation step.
Can AI rendering tools handle interior perspective sketches?
Yes, but interior sketches with converging perspective lines are harder than exterior elevations. Tracing the sketch over a simple one-point perspective grid before uploading improves proportion accuracy significantly.
What resolution should I scan my sketch at?
Scan at the highest resolution your app offers, generally 300 DPI or higher. Low-resolution scans lose fine line detail that the AI needs to read wall edges and openings correctly.
Is a photo of a sketch good enough, or do I need a scanner?
A phone photo works if shot flat under even light with a scanning app that auto-corrects perspective. A dedicated flat-bed scanner produces more consistent results, but it isn't required for good output in 2026.
One last thing
The single biggest quality gap between a mediocre sketch-to-render result and a client-ready one isn't the AI model — it's contrast. A sketch scanned under harsh top light with a gray gradient background will produce a soft, undefined render every time, even with a perfect prompt. Fix the scan before you touch the prompt.